How to Use ResQ Disc
The ResQ Disc™ is easy to use but just about anyone. We’ve had parents tell of teenagers using it and even physically disabled people have been able to deploy the device. Basically, if you can throw a frisbee, you can save someone’s life.
After undoing the velcro strap and securing it to your wrist or waist… you pull off about 10 feet of line, hold the ResQ Disc parallel to the ground or surface of the water and throw it like a frisbee in front of your target… the remaining line will uncoil.
 DETAILED RESQ DISC™ THROWING INSTRUCTIONS:
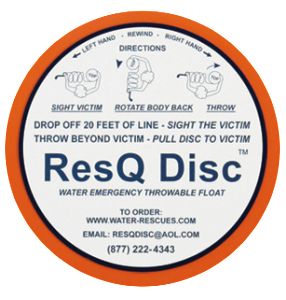
- Pull the tab on the velcro strap that holds the line in place.
- Unwind several feet or more of line and let it drop to the ground.
- Put your right hand thumb into the thumb indent.
- Rotate your torso with your right arm across your chest keeping the disc level.
- When you throw, quickly pull the disc in a straight line across your chest and extend your arm pointing at the target.
- Keep the disc horizontal (parallel or level to the ground) as you release it.
- When you release the disc at the end of the throw, snap your wrist causing the disc to rotate. shedding the line.
DISTANCE TIPS:
If the disc curves left – It was most likely tipped down when released.
If the disc curves right – It was most likely tipped up when released.
When it goes straight – the disc was level when you released it giving you the best distance and accuracy.
RE-THROW TIPS:
In an emergency, when you are not able to walk laterally to pull the disc to the victim and need to re-throw, put 6 wraps of rope on the disc leaving the rest on the ground. Throw as before. For 50-foot re-throws, throw the disc without re-winding the rope.
IF YOU NEED TO THROW OVER A GREATER DISTANCE FEET:
Loop the ends of 2 discs into each other and form a knot. Unwrap 50 feet from the 2nd Disc, dropping it to the ground. Leave all the line on the throwing disc and it will take the line on the ground and unwrap all the line from the thrown disc. Using this technique, which requires a more forceful throw, the disc should travel up to 100+ ft. NOTE: Some Disc Golf Players during testing were able to have it go 120+ feet.
The more you practice, as with any skill, the better you become.
IF YOU ARE LEFT HANDED:
If you are left handed, reverse the above instructions and be sure that the rope is wound on the disc in the properly direction.
Right-handed throwers wrap the rope on the disc clockwise when facing the label. Left handers wrap the rope counter-clockwise.
USE GOOD JUDGEMENT!
Do not throw the Disc at hard surfaces such as trees or buildings.
Use the Disc away from groups of people and only for practice near natural water and in actual rescue situations.
Tips for ICE RESCUES:
The best way to get your target out of water after having fallen through the ice is to get the disc to them. Have them grip the disc tightly while it lays on the ice surface and kick their feet while you begin to pull. Once the target’s torso is out of the water, they should remain FLAT on their stomach while being pulled to safety.
Another option is to have the victum put the disc between their legs and turn the disc 90 degrees to create a seat and cross their legs on the disc. With their hands free, have them tip forward toward the edge of the ice so the rope is not at a 90° angle and use their free hands to try to pull themselves onto the edge of the ice while you pull them up from a sitting position. Once on the ice, they should lay flat on their stomach while being pulled across the ice to safety.
If you need additional tips, or are having specific problems, please contact us.